
Fordeer hello to you!
In this guide, we'll walk you through the detailed process of modifying email campaign settings in our app.
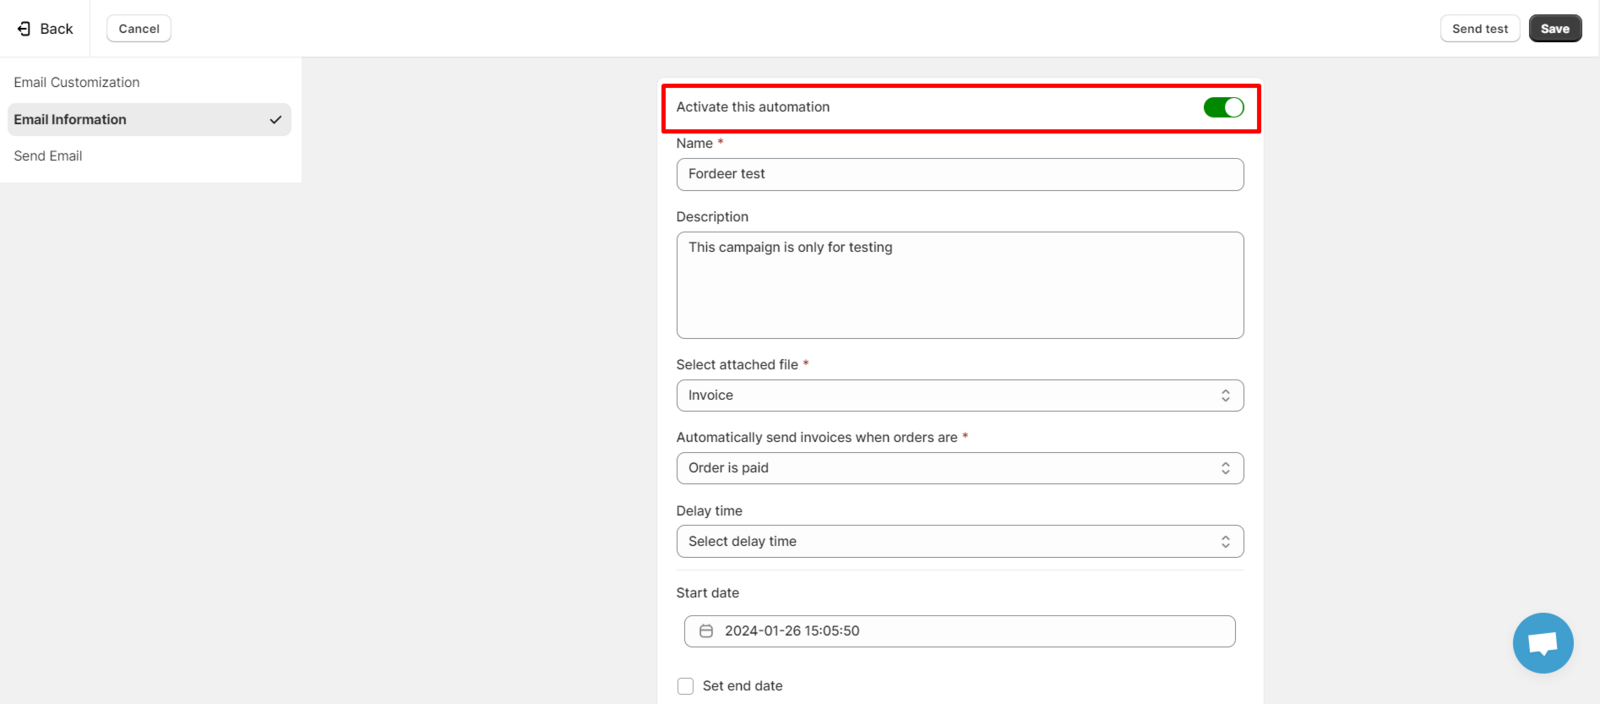
- Activating the campaign status: You have the option to enable or disable the campaign as needed.
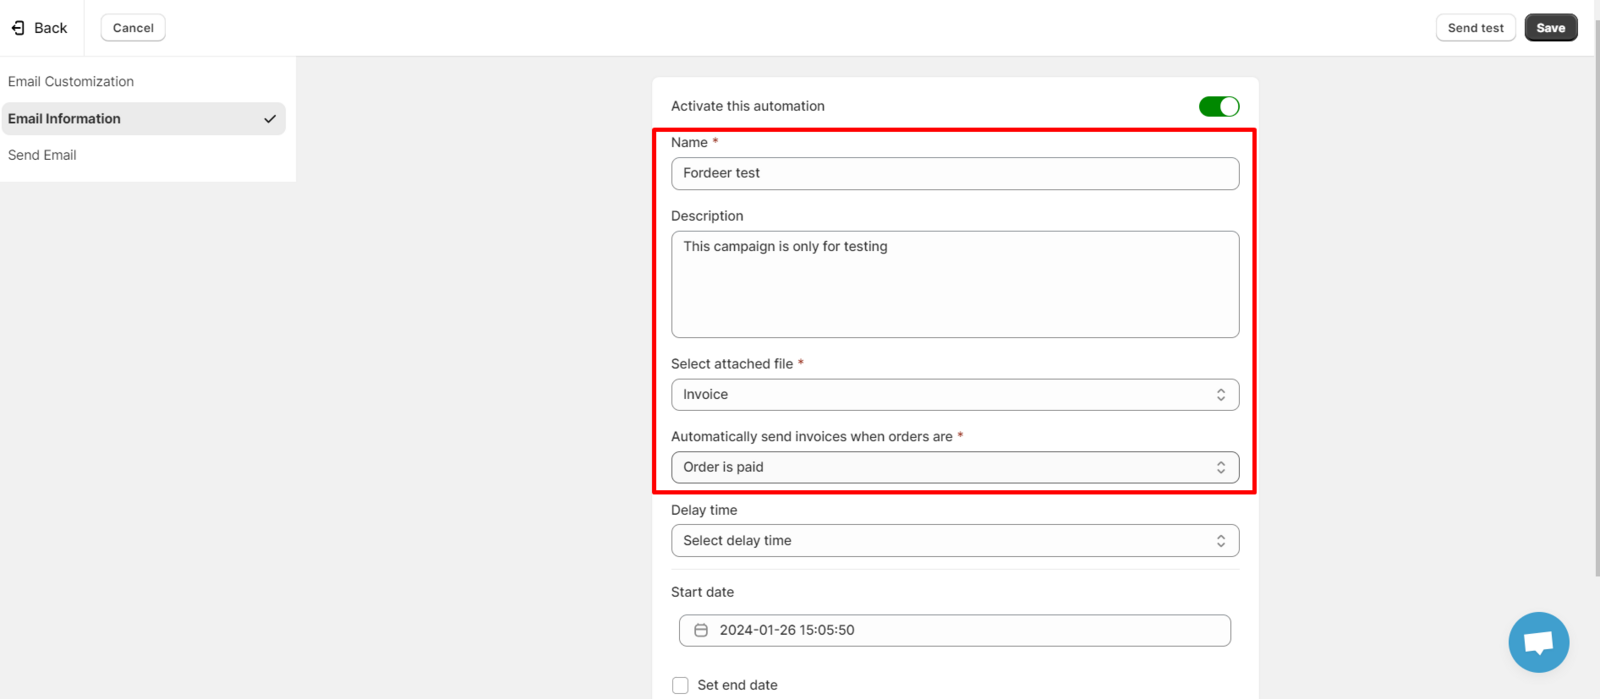
- Modifying basic information: While you've already filled out fields like Name, Description, and Attached File when initially creating the automation email, these can be adjusted anytime under the Email Information tab.
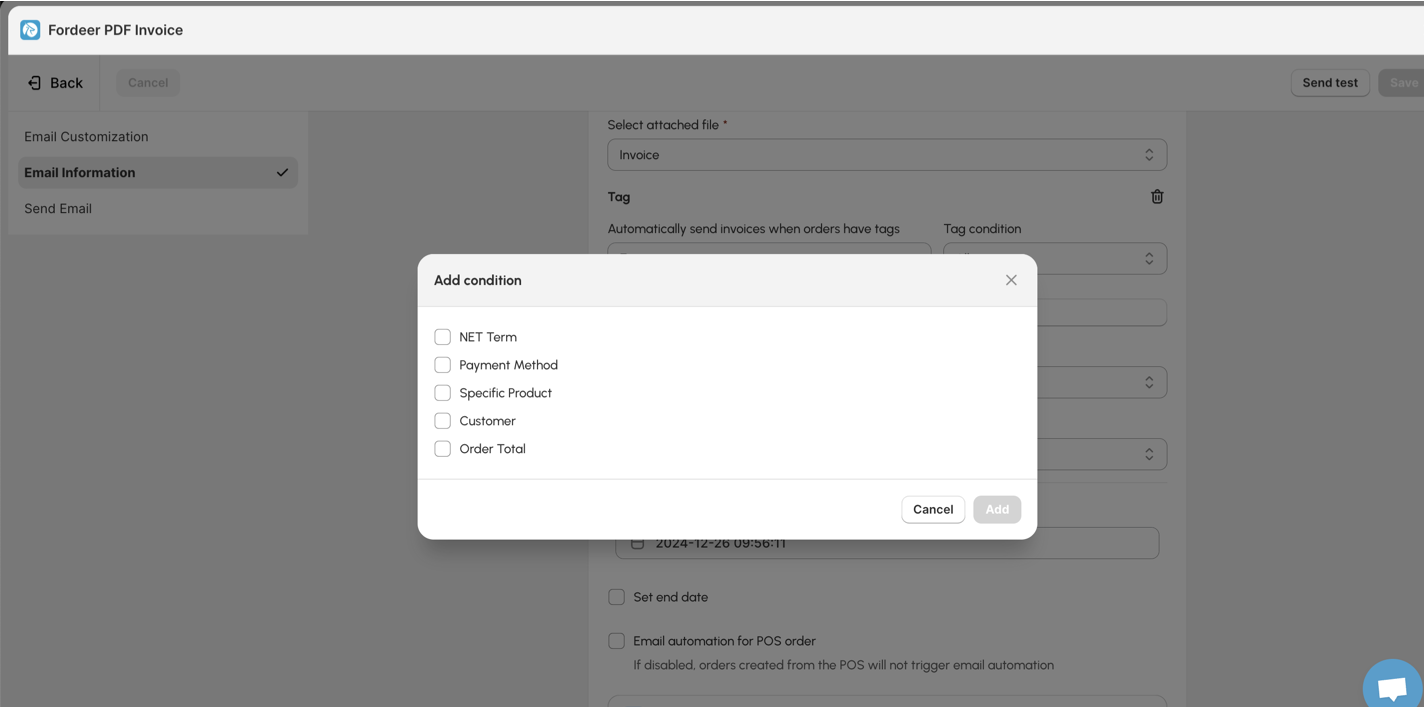
- Adding conditions: Add more conditions to automation flow besides the trigger
For example:
In this case, our automation email will send invoices when orders with tag "b2b" is created on the storefront.
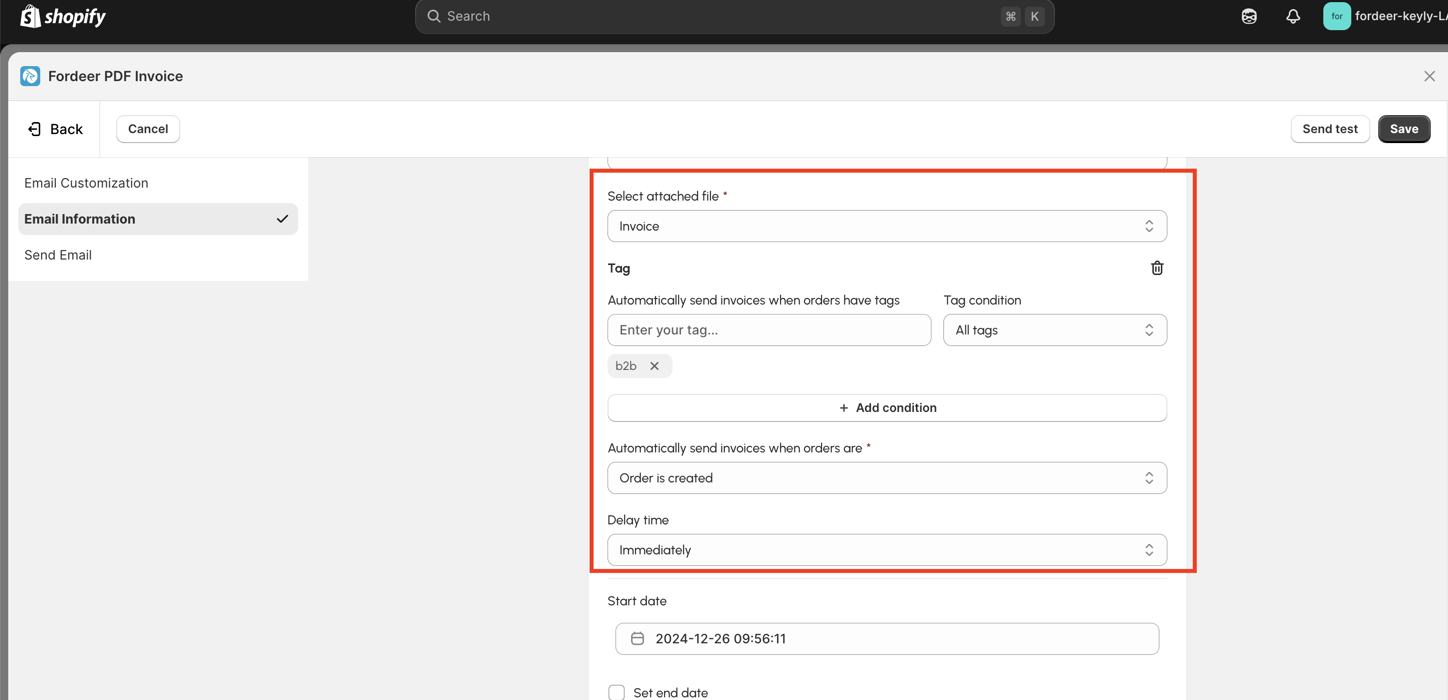
- Setting delay time: Determine how long after an order is placed that the email should be sent to your recipients. This delay can be crucial for timing your communication just right.
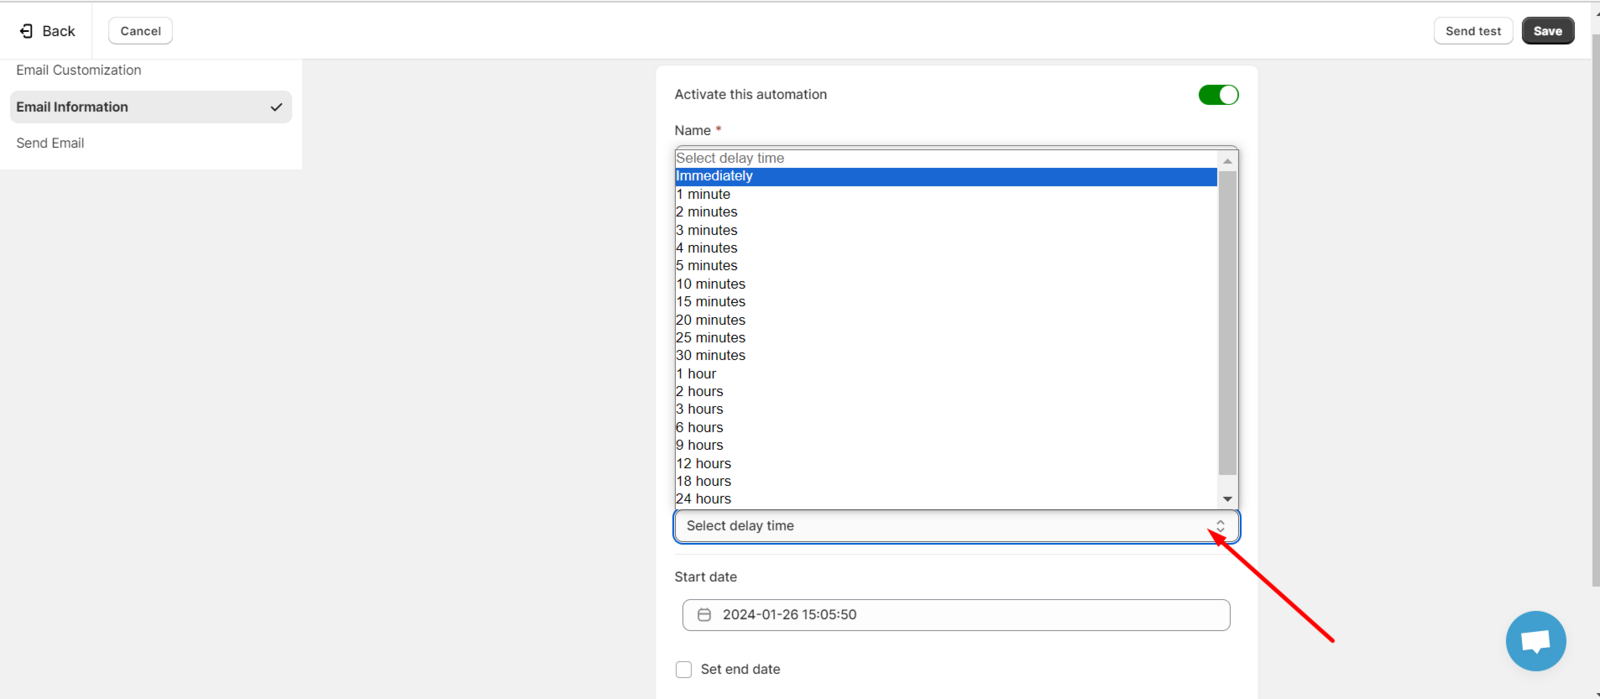
- Scheduling the campaign: Here, you have the flexibility to specify the start and end dates for your email campaign. This feature allows you to align the campaign with specific marketing periods or business strategies.
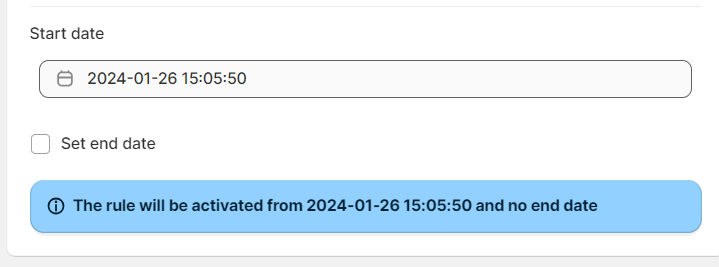
These features are designed to give you complete control over your email campaigns, ensuring they align perfectly with your business needs and marketing strategies.
Please give it a try and do not hesitate to contact us if the metafields does not display on your invoices, we will be more than happy to assist you.
We value your feedback — it helps us continuously improve app and provide you with a better experience.
👉 Chat with us: Share your feedback directly with our team.
👉 Explore more apps: Discover more Fordeer apps. special deals.
🕐 Working hours: 8:30 AM – 5:00 PM (UTC+7), Monday–Friday.
We typically reply to live chats within minutes and emails within a few hours.
Need help? Feel free to reach out anytime via live chat or email!